Part IV: Cables & Wiring
XLR, TRS & More
There is no better feeling than hooking up your gear correctly and being blown away by the sound.
A notion of accomplishment floods your senses after seeing all those lights turn on and everything running like clockwork orange.
What would our studios be without this stuff?
Nothing, that’s what! No, but seriously, try to make a beat with nothing hooked up. Not fun. ![]()
Luckily for you, there isn’t a ridiculous amount of wiring needed for your home studio setup, and your workspace doesn’t have to be a tangled up mish-mosh of confusion that seemingly takes forever to sort out.
Trust me I’ve been there, it’s really depressing (especially when nothing works lol).
Some standard cables that you may need include the following:
- 1/4″ instrument cables (TRS or TS)
- XLR cables.
- MIDI cables (if you decide on a MIDI device). Nowadays, most newer MIDI devices do not require actual MIDI cables anymore, but I still have some as they still come in handy.
- RCA cables.
- 3.5mm auxiliary cables.
Let’s take a look:
1/4″ instrument Cables
These will be used to connect various instruments to your interface as well as other components of your rig. For many, they serve as the bridge between my studio monitors and an audio interface. There are two types:
- TRS (balanced)
- TS (unbalanced)
TS cables are typically used with electric guitars on stage, while TRS are primarily meant for the studio.
That said, TS cables can be used in the studio as well.
Right now, I have a TS instrument cable plugged into my Korg Volca Keys, and the other end goes into the combo input on my Volt 2. This way, I can record myself playing and use those performances to make beats and songs.

- Related: How To Use A Synth In FL Studio
When it comes to connecting monitors to the back of an interface, TRS balanced cables are better than TS because they reduce noise and interference by using two signal wires and a ground, which helps cancel out unwanted electrical noise.
This results in a cleaner, more reliable signal, especially over long cable runs.

- Required Reading: TRS vs. TS [Cable Differences Explained]
XLR Cables
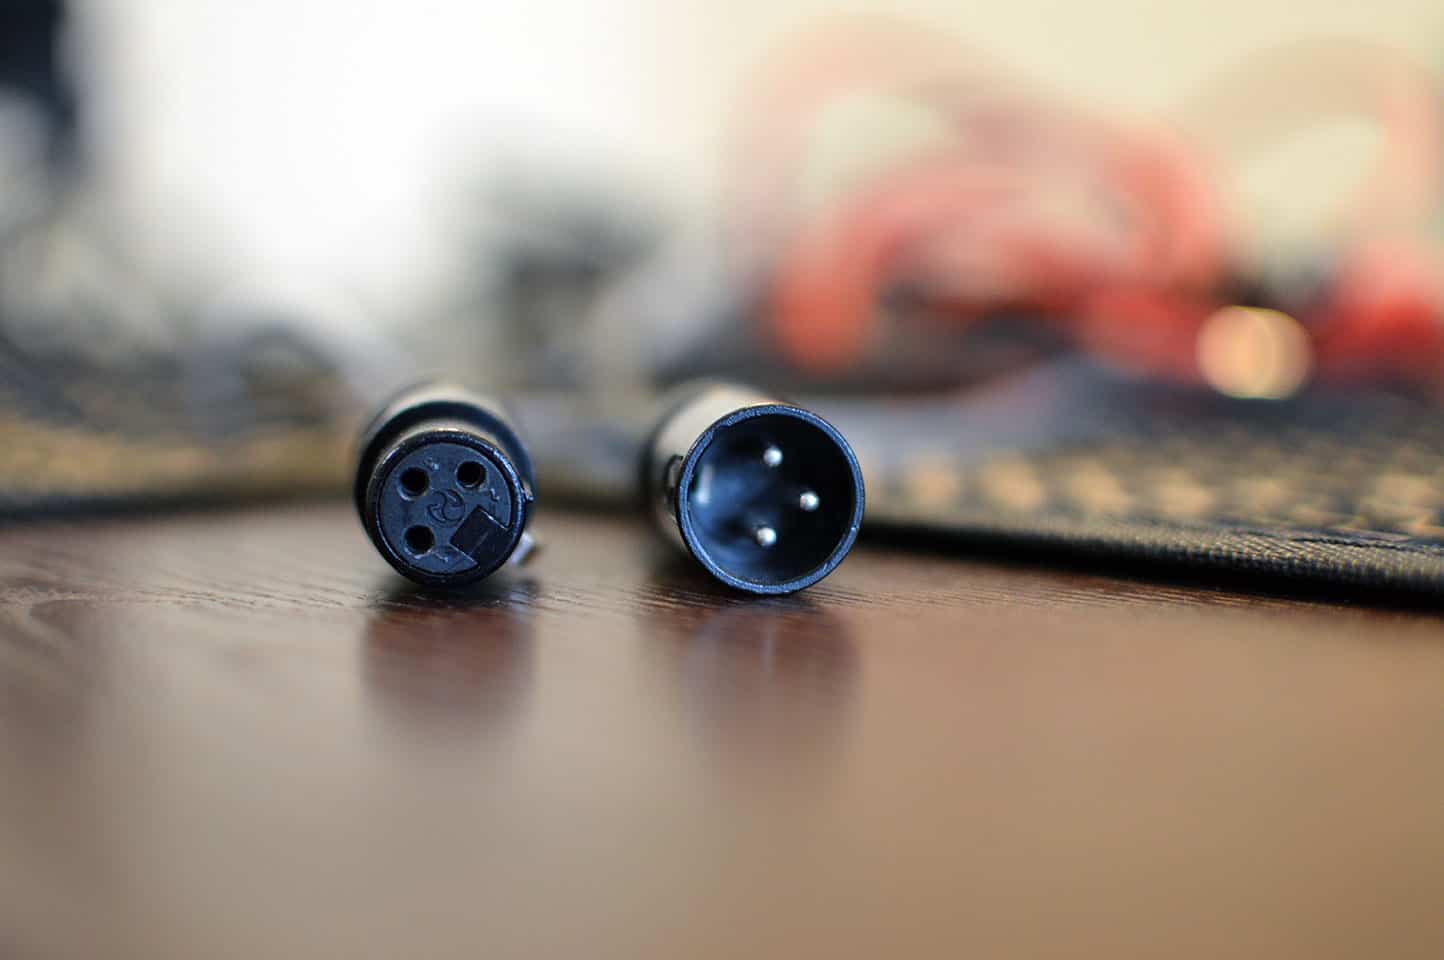
These are also balanced and generally connect from your mic to your audio interface (the mic preamps discussed earlier).
They can also provide the link from your interface to your studio monitors (mentioned above) by way of balanced TRS to XLR, or XLR to XLR.
If you were to go this route, you would need two wires to connect each monitor.
In addition, these will connect from your mic to the front of your interface (male to female):

Because many of the newer interface models come equipped with combo inputs (accepting both TRS and XLR, pictured above), your options become more versatile.
If you want to record an instrument but don’t want to use an amp, an option would be,
TRS > Direct Box > XLR > interface
This setup affords you the luxury of not needing two mics (one miking an amp and the other for vocals), and you can use it with any instrument that has a 1/4″ input or MIDI inputs (keyboard, for example).
Most interfaces nowadays can be used to record an instrument without any other miscellaneous gear.
The Focusrite Scarlett Solo 3rd Gen is a great example.
MIDI Cables

Traditional 5-pin MIDI cables aren’t necessary anymore because most modern MIDI controllers and synthesizers use USB, which allows for direct communication with a computer without the need for a dedicated MIDI interface.
USB also supports bidirectional data transfer, simplifying setup and reducing cable clutter.
However, MIDI cables are still useful in studio environments for connecting hardware synths, drum machines, and other gear without relying on a computer.
They provide reliable, low-latency communication between devices and allow for more flexible, standalone hardware setups.
RCA/Auxiliary Cables

RCA and auxiliary (3.5mm) cables are just about the most common types you’ll find in a studio or home theater environment since they can connect to darn near anything.
99% of standard headphone amplifiers and digital-to-analog converters utilize RCA or line connections, making it very simple to connect a DAC to an amp.
Chances are, you too have some of these lying around in places you never even thought possible. Sometimes when I’m cleaning my room/studio, or looking for something else I will come across at least 2 or 3 bundles of the OG homies (The infamous Red, White, and Yellow).
They have a huge influence on old electronics and used to be a mainstay in the house; primarily used for hooking up VCR’s, your camcorder, or your video game system to a display of some sort. Nowadays you can find them lying around collecting dust. It’s sad really, and it makes me feel old. ![]() Lol.
Lol.
The Red and White varieties are still useful, however. For example, my turntable comes equipped with some RCA males that can be plugged into an Amp/DAC like the FiiO K5 Pro/K7, active speakers, or even some basic speakers utilizing an adapter.
You could also use an instrument cable to RCA adapter and incorporate these into your studio if you need some wiring in a pinch.
👉If you’re looking for a more detailed guide on cables, check out The Cable Guide: Navigating the Essentials of Audio Cable Types
What You’ll Learn In The Next Section
- ✅Headphones for Mixing – Learn why high-quality headphones are essential for evaluating mixes objectively.
- ✅ Sound Signature – Discover the ideal sound signature for headphones: flat or rolled-off sub-bass, flat mid-bass, mild presence boost, and bright treble.
- ✅ Studio Monitors – Understand why studio monitors offer superior stereo imaging and depth, helping you make better mixing decisions.
- ✅ Choosing the Right Monitors – Explore budget-friendly options like the Presonus Eris e3.5, JBL LSR305, and Yamaha HS7 for great sound quality without breaking the bank.
- ✅ Closed-Back vs. Open-Back – Know when closed-back headphones are necessary, especially for those mixing in shared spaces.
- ✅ Personal Experience – Learn from my journey of starting with headphones and upgrading to monitors to improve mix quality.