
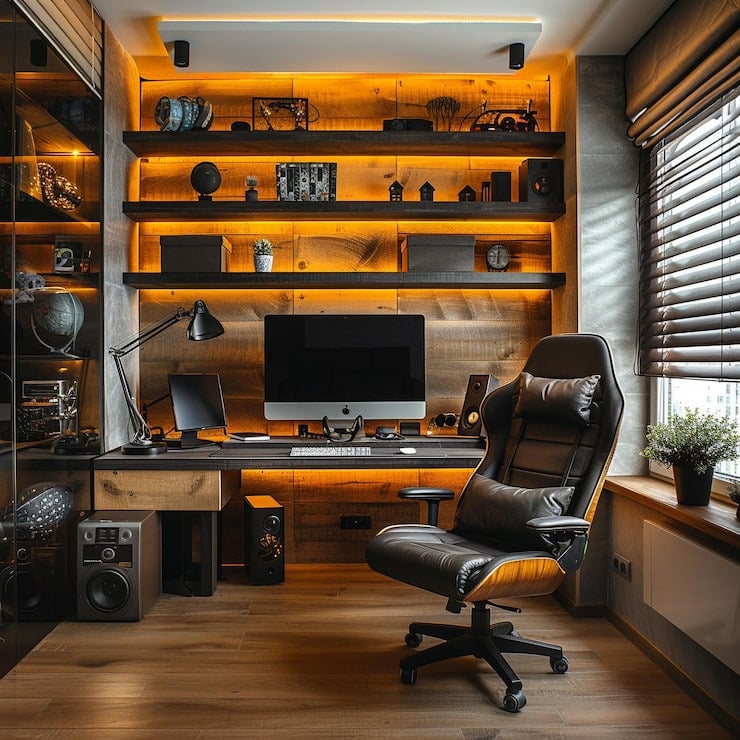
7 Smart Home Studio Design Ideas for a More Creative and Productive Workspace
A useful home studio makes recording, editing, and listening easier.
It starts with a room arrangement that suits the work: equipment within reach, clear floor space, sensible speaker placement, and a place to put accessories when a session ends. Expensive gear cannot compensate for a desk that is uncomfortable or a layout that makes everyday tasks awkward.
The same room may support music production, voice-over recording, podcasts, and video editing, but those tasks don’t need identical setups.
A producer might prioritize monitor placement and MIDI controls, while a voice-over artist needs a quiet recording position. Video editors may need additional displays, storage, and consistent lighting.
A successful studio does not have to be large or expensive. Thoughtful planning can make even a spare bedroom or a compact corner more functional. These seven home studio design ideas focus on practical improvements that support creativity, comfort, and productivity while leaving room for future upgrades.
Plan the Room Around the Main Creative Task
Before buying furniture or equipment, identify the activity that will occupy most of your studio time. A producer working with a MIDI keyboard needs space for controls, while a voice-over artist needs a practical microphone position and a quiet recording area. A video editor may place more emphasis on displays, lighting, and file organization.
Start by creating a simple floor plan. Mark the locations of the desk, chair, speakers, microphone stand, storage units, and other large equipment. Consider door swings, windows, electrical outlets, and the amount of space needed to move comfortably around the room.
The room should also have clearly defined working zones. For example, a main workstation can hold the computer and audio equipment, while a separate corner accommodates microphone recording. Shelving can provide storage without taking up valuable floor space.
If the room is small, prioritize equipment that supports multiple activities. A movable microphone stand, compact keyboard, or adjustable monitor arms can make it easier to change the setup without rearranging the entire room.
Think about the room’s existing characteristics, too. Hard floors, large windows, and bare walls can influence reflections and recording quality. Identifying these challenges before purchasing equipment helps avoid unnecessary spending.
Match the Work Surface to Its Actual Use

The work surface should support the equipment, accessories, and activities that define the studio. Wood, engineered wood, and laminate are practical choices for many desks because they can provide a stable working area without making the furniture unnecessarily complicated.
For homeowners coordinating a kitchen renovation and a permanent creative workspace, material planning can sometimes overlap.
For example, kitchen countertops in Charleston from Perfect Stones provide a reference point for exploring custom-fabricated quartz, granite, marble, and quartzite surfaces.
A similar material discussion can help when planning a separate built-in studio counter, provided the weight, support, dimensions, and equipment-mounting requirements are assessed for that specific application.
Before choosing a desktop, consider the equipment that will rest on it.
Microphone-arm clamps, monitor arms and other accessories need sufficient mounting space and suitable structural support. Leave room for cable openings, audio interfaces and frequently used controls.
A permanent built-in counter may offer a clean appearance, but it should be designed around the actual studio requirements. Stone surfaces can be heavy, so cabinetry, support structures, and installation details must be planned accordingly. The desktop material itself should not be considered an acoustic treatment or a replacement for proper speaker positioning.
Choose a Desk That Fits the Equipment and the Person
A good studio desk should accommodate the equipment used regularly rather than every item you own. A computer, audio interface, keyboard, mouse, and controller may be enough for the main surface. Less frequently used equipment can move to a nearby shelf or cabinet.
Desk dimensions deserve careful attention. Width determines how much equipment can fit, while depth affects monitor distance, keyboard placement, and available working space. A desk that is too shallow may force the computer display close to your face or leave insufficient room for your hands.
Ergonomics are equally important. Long editing, mixing, and recording sessions can place strain on the neck, shoulders, wrists, and lower back. Your chair should provide suitable lumbar support, and its height should allow your feet to rest comfortably on the floor.
Ideally, your elbows should remain close to your body, with your forearms approximately parallel to the floor while typing. The keyboard and mouse should be positioned at a comfortable height, and your monitor should be placed so you can view it without constantly bending your neck.
Monitor arms can help free up desk space and make screen positioning easier. A keyboard tray may also be useful when the desk height does not suit your preferred working position.
Consider alternating between sitting and standing if your workspace allows it. An adjustable desk can provide more flexibility, although even a simple routine of standing, stretching, and taking short breaks can make long sessions more comfortable.
Improve Speaker Placement and Room Acoustics

Speaker placement is one of the most important considerations in a music production studio. Even high-quality monitors can produce misleading results when positioned poorly.
For a stereo setup, a useful starting point is a symmetrical arrangement with the listening position and speakers forming an approximate equilateral triangle. Genelec recommends positioning the speakers’ acoustic axes at ear level. Always check the manufacturer’s instructions for the recommended orientation and spacing.
The speakers should be positioned at similar distances from the side walls, where possible. Large differences between the left and right sides of the room can affect stereo imaging and create an unbalanced listening experience.
Reduce Monitor Vibrations and Desk Reflections
Studio monitors placed directly on a desk can transfer vibrations to the furniture. These vibrations may contribute to unwanted resonance, particularly when the desk has a large, hollow, or lightweight structure.
Monitor isolation pads or dedicated stands can help reduce mechanical coupling between the speakers and supporting surfaces. Isolation products should be selected according to the monitor’s weight and design.
Raising speakers above the desk can also create more space and allow better positioning. If using stands, make sure they are stable and that the speakers cannot be knocked over accidentally.
Desk reflections are another issue worth considering. Sound from the monitors can reflect off the desktop before reaching your ears, potentially interfering with the direct sound. A large, hard surface positioned between the speakers and listening position can contribute to these reflections.
Adjusting speaker height, distance, and angle can help manage the problem. Avoid filling the desk with unnecessary objects that obstruct the path between the speakers and your listening position.
Understand Acoustic Treatment and Soundproofing
Acoustic treatment and soundproofing solve different problems. Absorption panels and bass traps help manage reflections and low-frequency buildup inside a room.
Sound isolation addresses sound transmission through walls, floors, ceilings, windows, and doors.
Foam panels alone should not be treated as a solution to traffic noise or music reaching an adjoining bedroom. Effective isolation often requires attention to the room’s construction, including gaps, doors and structural connections.
Start with the most noticeable acoustic problems. Listening tests, speaker measurements and professional advice can help determine whether the room needs additional absorption, bass trapping or isolation work.
Use Lighting That Supports Screens and Recording
Lighting influences both comfort and the appearance of a studio.
A room should provide enough illumination for reading controls, connecting cables, and working on detailed editing tasks without creating unnecessary glare.
Natural daylight can make a studio more pleasant, but direct sunlight may create reflections on displays and polished surfaces. Adjustable blinds or curtains allow you to control changing daylight during recording and editing sessions.
Use task lighting near the main workstation. An adjustable desk lamp or LED light can illuminate the keyboard and equipment without relying entirely on a bright overhead fixture.
Video creators should pay particular attention to the direction and quality of light. A basic three-point lighting arrangement can provide a useful starting point for interviews, tutorials, and talking-head recordings.
The key light illuminates the subject, while the fill light softens harsh shadows. A backlight can help separate the subject from the background. The setup does not need to be expensive, but consistent positioning and brightness make a noticeable difference.
Remember to check the camera image before recording. A light that looks attractive in person may create reflections on glasses, computer displays, or shiny surfaces.
Plan Power, Ventilation and Cable Management
A productive studio requires more than enough electrical outlets. Computers, audio interfaces, speakers, displays, lighting equipment, and chargers can quickly create a complicated power arrangement.
Before setting up the room, identify where each major piece of equipment will be located. Plan outlet access around the desk and recording areas so cables do not need to cross walkways.
Avoid overloading outlets or connecting multiple power strips in an unsafe chain. Use appropriately rated equipment and consult a qualified electrician if the room needs additional outlets or dedicated electrical circuits.
Surge protection may be useful for protecting sensitive electronics against voltage spikes. Keep power cables and audio cables organized, and avoid placing them together unnecessarily where interference could become a concern.
Keep Equipment Cool
Ventilation is another detail that is easy to overlook. Computers, amplifiers, external drives, and other electronics produce heat during operation.
A crowded desk or enclosed cabinet can restrict airflow and increase operating temperatures. Leave sufficient clearance around ventilation openings and avoid placing equipment directly against walls when the manufacturer recommends additional space.
If you use a rack cabinet, choose one with appropriate ventilation. Quiet fans may help maintain airflow, but their placement should not introduce unwanted noise into a microphone recording area.
A comfortable room temperature also makes long sessions easier. If the studio is in a small bedroom or enclosed space, consider how the room will remain ventilated when the door is closed.
Make Cable Management Practical
Cable management should make connections easier to identify and reach. Label both ends of important cables, keep connectors accessible, and allow enough slack for equipment to move as intended.
Under-desk trays and reusable cable ties help keep the floor clear, provided they leave sufficient legroom. A cable route should not pull against a connector when the chair moves or the desk changes height.
Separate audio, power, and network cables where practical. Keep frequently used adapters in a labeled drawer so they can be found quickly when equipment needs to be connected or replaced.
Good cable management is not only about appearance. It reduces accidental disconnections, makes troubleshooting easier, and creates a safer working environment.
Separate Recording, Storage and Project Organization
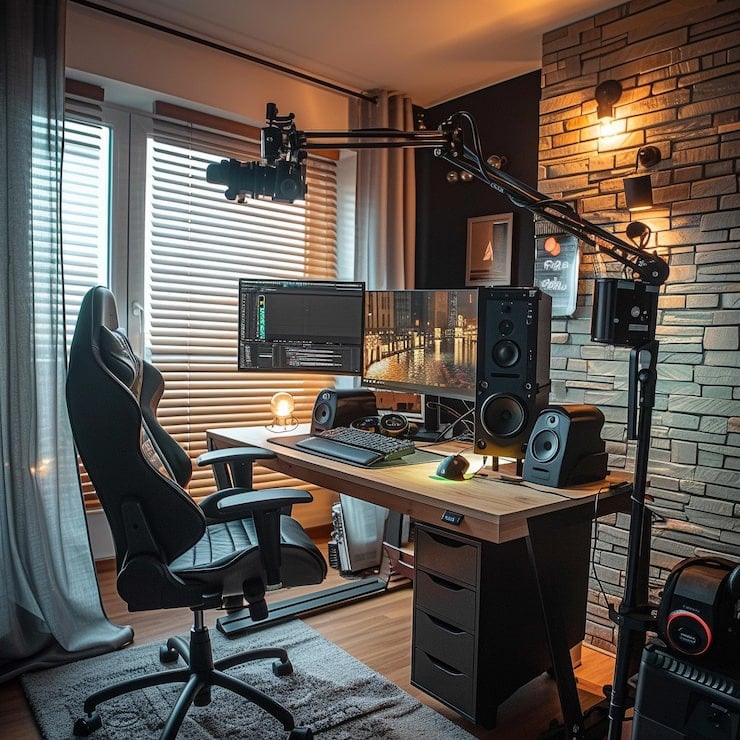
Even a small studio can have defined places for different tasks. A microphone stand can occupy a recording corner, while headphones, adapters, and accessories have a dedicated shelf or drawer.
Use vertical storage when floor space is limited. Wall-mounted shelves can hold lightweight accessories, books and small equipment, while cabinets provide a place for items that do not need to remain visible.
Keep heavy equipment on stable surfaces and avoid placing valuable electronics where they could fall. Frequently used accessories should be easy to reach, while rarely used items can be stored elsewhere.
Digital organization deserves the same attention. Create consistent project folders for recordings, edits, exports, samples, and reference material. Use descriptive file names that include the project name and relevant version information.
A separate backup location is also important. External drives and secure cloud storage can help protect creative work if a computer fails or files are accidentally deleted.
Leave Room for Future Equipment
A studio that works today may need adjustments as your creative projects develop. You might add a second monitor, a larger MIDI keyboard, additional microphones, or an external storage system.
Avoid filling every available space immediately. Leave spare outlets, accessible cable routes, and some free desk or shelf capacity for future additions.
Modular furniture can make upgrades easier. Monitor arms, adjustable shelves, movable stands, and rack systems allow equipment to be rearranged without rebuilding the entire workspace.
It is also useful to document your connections. A simple diagram showing which audio interface inputs connect to specific microphones and instruments can save time when changing the setup.
The goal is a flexible room that can grow with your work instead of becoming difficult to manage every time you purchase new equipment.
Closing Thoughts
A well-designed home studio supports the creative work already taking place in it. Start with the room layout and workstation, then improve ergonomics, speaker placement, lighting, electrical planning, ventilation, and storage.
Choose materials and furniture according to practical requirements, and leave room for future equipment. Small improvements that remove everyday obstacles can make a studio more comfortable, organized, and productive.
FAQ’s
Does a home studio need a custom desk?
No. An existing desk can work well if it provides enough space, structural support, and comfortable access to the equipment. Custom furniture becomes more relevant when the room or equipment arrangement creates specific requirements.
Can stone be used for a studio work surface?
It may be suitable for a properly planned built-in counter. The fabricator and furniture installer should establish the required support, dimensions, openings, and mounting arrangements before fabrication.
Will a different desktop material improve the sound?
Changing the desktop alone should not be treated as an acoustic upgrade. Speaker positioning, desk reflections, room dimensions, and appropriate acoustic treatment should be considered together.