How To Record And EQ An Acoustic Guitar
Greetings mate and Welcome aboard!
Stuart Charles here, HomeStudioBasics.com helping YOU make sound decisions, so…
EQing a guitar is rather simple, and it’s even easier if you have something like an MXL 991; a mic designed specifically for recording an acoustic.
That said, today we’re going to get our hands dirty inside FL Studio and I’ll show you exactly what I do. Keep in mind the process of EQing something is the same regardless of what program you’re using.
Just look for the Parametric EQ function and adjust from there.
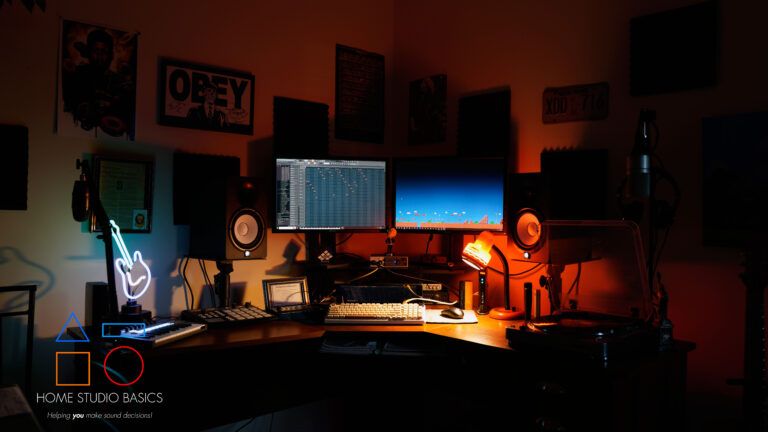
Recording The Acoustic Guitar
First things first: let’s discuss how to record it.
For this you’ll need a few things:
- A microphone
- XLR Cable(s)
- A mic stand
- An audio interface
- Recording software
Microphone

It goes without saying, but you’re going to need not just a mic, but the right mic.
Yes, you can theoretically record with almost anything, but having the proper tool will make your life a whole lot easier.
As a budget option that doesn’t sound budget, I recommend the MXL 991; a small diaphragm condenser made specifically for acoustic guitar.
Don’t forget an XLR cable or 2 as well. As my brother-in-law always says, “You can never have too many.”
- Required Reading: Comparing Large-Diaphragm vs. Small-Diaphragm Microphones
Mic Stand
Unless you’re Robert Plant with half of his clothes missing, I’d go ahead and invest in a mic stand.
I’ve used a few different varieties over the years including a Boom Stand, Desktop Stand, and now this Scissor Arm.
You’ll love the convenience of a Scissor as you can easily swing it out of the way when it’s not in use.
It’s also a lot more versatile and adjustable than a Desktop stand or Boom since you can achieve many different angles and heights without having to move the entire thing around.
Boom Stands are infamous for sway; that is, sometimes the mic is too heavy for the stand and drifts around. It may drift regardless, which can be a massive pain in the ass. Trust me, I’ve been there.
That said if you do plan to record a bit farther away from your desk space, a Boom Stand is probably a better option.
Audio Interface
An audio interface is both a DAC (Digital-to-analog converter) and an ADC (Analog-to-digital converter). That is, it converts your voice to binary language a computer understands (when recording music), and also digital information to analog (when listening to music).
Condenser microphones also require the 48v phantom power that an interface supplies.
I use and recommend the Universal Audio Volt 2, a fantastic option that won’t break the bank and also allows you to record another instrument like a Synthesizer, bass, etc.
- Recommended: Universal Audio Volt 2 Review

An interface like this can also connect to active speakers like my Yamaha HS7, so it’s an invaluable little tool in a home studio and required if you’re ready to start recording.
Recording Software
I use Audacity, Reaper, and FL Studio primarily.
Audacity is completely free, Reaper is free for 60 uses and then a one-time payment of $60 is required.
FL Studio comes with a free trial and costs around $200 for the Producer Edition. I bought it and feel it’s worth every penny, but consider how often you make music and what you’re comfortable paying for.
Recording with Audacity
First, go here and download the program.
Open it up, and head to Audio Setup > Recording Device.

Now choose whatever you have. I’m using the Volt 2 as mentioned.
Turn on 48v phantom power and press record.
Recording in FL Studio
Click here for a step-by-step guide.
Today’s guide focuses more on placement and technique, but the above article is invaluable if you’re new to FL.
Placement & Technique
Now that we’ve got the setup taken care of, let’s discuss placement; a super important aspect and one that you won’t want to gloss over.
Start by connecting your interface to your PC via USB. Now run an XLR cable from Input 1 on the front of the interface to your mic, and turn on 48V phantom power.
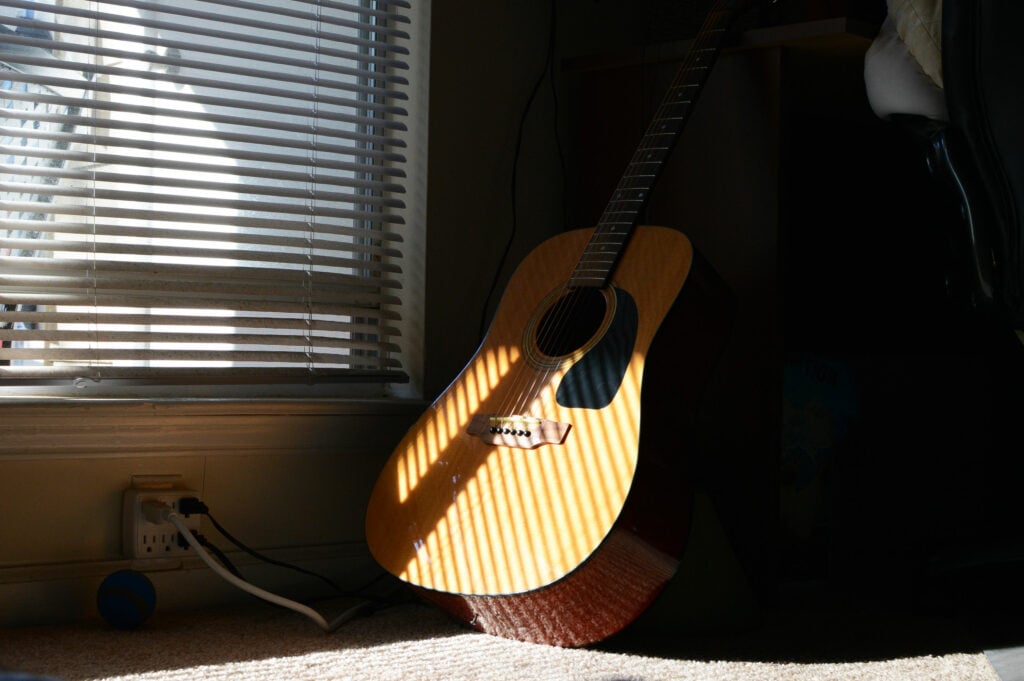
To get the best recording, angle the mic at around 45° toward the neck of the guitar; around the 13th/14th fret and 4-6″ away.

In the image above, where the neck of the guitar meets the body is right in the middle.
I took this image with one hand while I held the guitar in place, so if you found this article helpful, share!
You should experiment with it and find what works best, but these general guidelines will get you started in the right direction.
Never point the mic directly at the sound hole. This will unnecessarily bring out way more low-end information than is needed, which makes the recording sound like it has a layer of maple syrup covering everything.
That said, regardless of whether you have a good recording or not, there’s always EQ to iron out the kinks.
Let’s discuss it.
EQing An Acoustic Guitar
As complicated as some people make this out to be, it’s not.
And that’s because recording an acoustic guitar presents only one glaring issue in that most microphones pick up way too much unnecessary low-end information, causing the recording to sound muddy and lacking resolution.
Fortunately for us, there’s a simple fix.
In FL Studio, first, make sure your recording is available.
No matter what you choose to record with (Edison or in the Playlist window), you can EQ it.
I know I linked a separate guide, but for convenience, I’ll go through the process real quick.
First press record, and it will ask you what you want to record.

Stick to the first 2 options: Audio into the Edison audio editor/recorder, or Audio, into the playlist as an audio clip.
We’ll first choose the Playlist method.
Recording Into The Playlist

Before recording, it may prompt you to choose your input. Select whichever one your mic is plugged into. Mine is Input 1.
Now a countdown should initiate. After it’s done, start playing! You’ll see the information appear in the Playlist after you’re done recording.
From here, click the left-most side of the clip where you see a small waveform > edit sample.

This opens up what you just recorded into Edison.
Edison Method
Pretend like you’re starting over, click record at the top, and when it asks you what you want to record, click Audio into the Edison audio editor/recorder.
It may ask you to select an audio input first. Just select the one your mic is plugged into. Again, I’m using Input 1, so I’d select that.
Now hit record in Edison and start playing your guitar – keeping in mind the placement techniques we discussed earlier.
You can always drag the recording from Edison into the playlist as well. Just click the Drag / copy sample / selection button.

It’s also a good habit to set the recording time to FOR “EVER” so you don’t get cut off if you happen to start jamming out and lose track of time. Been there, done that.

Now head on over to the mixer (F9), and find which insert you recorded in.
In slot 1, click the arrow button and search for “Parametric EQ 2.”
Select it.

Right-click the first frequency button (#1) to the left > high pass. This will cut out most of that unwanted low rumble and mud from the recording.

From here you can play around infinitely by using the colored dials on the right or just move the buttons around with your mouse.
Experiment and see what works with your own recording. Trust your ears!
You can also add a shelf to add clarity and some air to the top end.
Additionally, you could also bring out the presence regions a bit around 2-3kHz, but that’s entirely up to you and depends on your preference.
Listen to the recording with and without EQ:
Notice how much better it sounds? That boxiness is gone and the sample sounds clearer and has more air at the top.
This is what my EQ looks like:

Keep in mind I’m always adjusting my EQ profiles and tweaking the sound. If needed, you can boost the presence regions. Your guitar is different than mine and thus will benefit from something entirely unique.
Another point I want to mention is that it’s entirely possible to cut too much from the low end, and we don’t want that either. Doing so will make the guitar sound overly thin, dry, and lacking body. In other words, skin and bones should be avoided at all costs.
Just play around with it until you find that there’s just enough to retain some essential THICCness without being overdone like your mom’s meatloaf.
And with that, I hope this guide has helped get you moving in the right direction. Reach out to me with any questions and I’d be happy to help.
Well, that’s about it for today my friend! I hope you’ve enjoyed this discussion on How To Record And EQ Acoustic Guitar, and came away with some valuable insight.
Questions? Comments? Requests? Did I miss the mark on something? Please let me know down below or Contact me!!
If you love what I do here and want to support the blog and channel in a more personal way, check me out on Patreon and discover all the value I have to offer you.
Are you ready to start recording? I would love to hear from you. Until next time…
All the best and God bless,
-Stu
Can’t decide which headphones to purchase? Interested in a complete buyers guide outlining over 40 of the best options on the market? Click on over to the best audiophile headphones to learn more!!
Be sure to also check out my Reviews and Resources page for more helpful and informative articles!