How to Choose a Microphone | EVERYTHING YOU SHOULD KNOW!!
Hey there friend, and Welcome aboard!!
Before we get into How to Choose a Microphone, grab a snack, sit back, and relax because…
You’ve come to the right place!!
Introduction
Choosing a Microphone can seem like a daunting task given how many there are out there.
My very first microphone was the Samson C01, and I’ve talked about it ad-nausea over the years.
It held up remarkably well since I bought it all the way back in 2007-2008 and was just about the most rugged and heavy piece of equipment I had in my studio.
This condenser microphone paired with an audio interface and XLR cable provides what you’ll need to quickly get started recording, well, anything!
With that, let’s take a look at some Criteria involved in the decision-making process…
USB vs. XLR
One of the first considerations to make is whether or not you’ll want a USB mic or an XLR mic. What is XLR?
USB
USB microphones are much more convenient. Plug and play is what all the kids are calling it these days.
All you have to do is plug the cable into your mic and slide the other one into the USB slot on the side of your PC/Laptop.
After that, your device should be recognized immediately.
If it’s not, the mic is either a piece of crap or you’ll simply need to download a driver from the manufacturer’s website. No big deal! 😀
USB mics are nothing to scoff at, either. After demoing and researching a few different units, I settled on the Blue Yeti.
It’s actually the main mic that I use for my YouTube channel and has become a mainstay in my home.
The sound quality is just about as good as something like an AT2020.
Right now, it’s just what I need, and has proven to be the most flexible and versatile unit that I’ve ever had. We’ll get into it a bit later!
A good USB mic is ideal for:
- Podcasters/YouTubers.
- People who don’t want the hassle of purchasing separate gear.
- People who aren’t familiar with Interfaces or Mixers.
- People who want great sound at an affordable price.
XLR
An XLR mic simply uses an XLR cable and must be plugged into an Audio Interface, Mixer, Preamp, etc.
For beginners who are looking to get their feet wet, I would recommend an Audio Interface to start.
- Related: What does an Audio Interface Do?

Let’s discuss quickly what an Interface can do. Something like my Focusrite Scarlett 2i2 can:
Connect to my Studio Monitors.
This is done via its Balanced Line Outputs on the back.
Some other units come with RCA/Analog, etc., but I prefer balanced.
This is because the TRS cable utilizes reverse polarity to completely cancel out any noise and interference that may happen when the sound is in transit.
Power my Condenser Microphone.
This is done via 48v phantom power.
Condensers by default have a weak signal on their own and need this power to reach acceptable listening levels.
Just make sure your 48v phantom power button is pressed or you won’t hear anything!
This is a common issue in forums and reviews.
People write negative reviews for condenser microphones or audio interfaces without realizing that they forgot to flick the switch.
Function as an Amp/DAC.
An interface like the 2i2 is also a DAC (Digital to Analog Converter) that converts the digital 1’s and 0’s that your computer understands into the analog sound that you hear.
This is really a mind-blowing process when you dig deeper into it.
- Related: What is a USB DAC?
Basically, you can plug your headphones into the 1/4″ jack on the front, and you’ll have a pretty decent Amplifier.
Outside of your computer, the interface is perhaps the most important component of your chain.
You could also opt for something like a Mixer, but I prefer an interface.
For instance, if you’re more hands-on and like to feel knobs turning with your fingers, a mixer is probably better for you.
- Related: What does an Audio Mixer Do?
An XLR microphone is ideal in the following scenarios:
- People who are a bit more serious about recording Instruments and Vocals.
- People who want better sound quality out of their purchase.
- People who are more familiar with Interfaces and Mixers.
- People who have more room in their Studio Space.
Now that we have an idea of the differences between XLR and USB, let’s take a look at some more considerations!
Condenser Mic vs. Dynamic Mic
This is a big one and could make all the difference in your purchasing decision. Let’s take a look at the Condenser.
- Related: Condenser Mic vs. Dynamic Mic

Condenser
A Condenser Microphone tends to pick up a lot of ambient noise, as well as background sound and such.
The good news is that it does reject anything going on behind it and to some extent the sides.
I find that even with no Acoustic Sound Treatment in my room and a highway full of buzzing cars outside my window, it’s still relatively quiet.
There are also two types to consider: The Large Diaphragm and the Small Diaphragm.
Small Diaphragm
A Small Diaphragm Condenser is under 1 inch in diameter and proves to be a little better at handling transients and other high-frequency information, due in part to its smaller and more compact diaphragm.
These sound a bit airier and sometimes have less coloration than an LDC.
Small Diaphragms tend to work well with Woodwinds, Acoustic Guitars, Cymbals and Hi-Hats, Small Percussion Instruments, delicate instruments, and anything else that has a lot of detail.
Large Diaphragm
These are greater than 1 inch in diameter and do a great job of bringing out the lower frequencies.
This is why they’re more sought after for Rap Vocals, as they tend to beef up your voice.
It also helps to kind of alter your vocals a bit and concentrate on delivering the Rap with a bit more ferocity. Like a Lion!
A Large Diaphragm has more of a big sound, but they have a thicker and heavier diaphragm, which means they won’t react as fast to changes in sound.
Learn more about the differences: Large-diaphragm vs. Small diaphragm
Dynamic
Dynamics are much less sensitive and will not pick up nearly the amount of background/extraneous noise if any at all.
To start off, dynamics are a lot more durable.
In general, even if I have a really rugged condenser, I’m more concerned about it dropping than I would be a Dynamic.
Dynamics are also better for live applications because of that very reason: They are much more durable and can handle quite a bit of abuse.
This is why mics like the SM57 and SM58 have been live staples for so many decades.
The Shure SM7B represents just about the best all-around Dynamic mic on the market for studio work.
It’s been used in studios for decades by some of the most popular artists of all time.
Michael Jackson used an original SM7 on his 1982 hit album “Thriller” and many more have used it since.
- Learn more: Shure SM7B dynamic microphone review
With a Dynamic, you won’t need a separate power supply, as they can be plugged into an array of equipment without the need for 48V phantom power.
Because they are less sensitive, they’ll do well in a less-than-ideal studio environment.
If you don’t have or plan on investing in any kind of treatment for your room, a dynamic might be the better option.
The trade-off is that something like an SM7B needs a bit more gain than is provided by a basic Audio Interface.
Fortunately, the solution is rather simple. Check out the SM7B article above for more details!
A Dynamic won’t pick up background noise, ambient noise, your neighbor taking a dump, or the guy above you having sex. Lol.
Whew! Moving onward…
Let’s discuss everything you’ll need!
Set Up and What You Will Need

As alluded to earlier, with a USB mic, you’ll just need a USB connection.
By now, nearly every device that’s worth a darn has one.
With an XLR mic, it’s a bit more involved but still not too difficult. Let’s discuss some major components needed!
The Microphone.
This goes without saying, but I’m including it anyhow.
A Mic Stand.
I had the Pro-Line MS112, which is extremely durable, rugged, and heavy.
I eventually sold it in favor of this scissor arm, which is much more convenient.
You may opt for either, but I recommend a scissor.


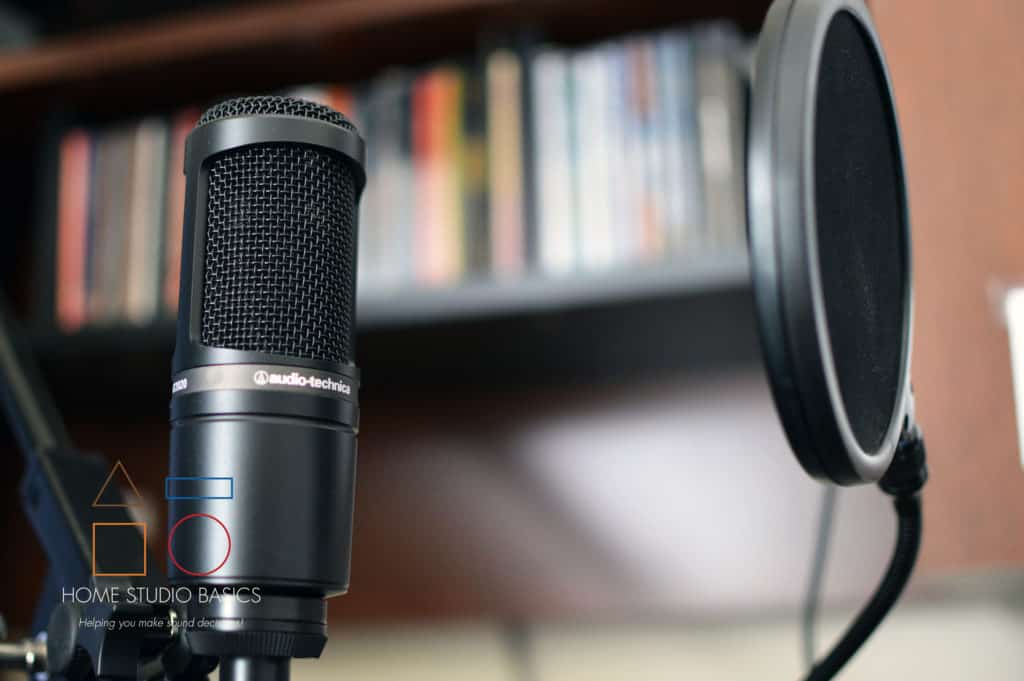
A Pop-Filter.
This is pretty much mandatory, at least for a Condenser. If you don’t invest in one, your audio is going to sound like poop.
Lots of plosives, crackling, uneven sound, etc.
It’s also mandatory to keep your nasty spit and undesirables from your dirty mouth out of the grill and the capsule.
If you don’t invest in a Pop-Filter for a Condenser microphone, your mic is likely to get damaged over time.
- Related: What is a cardioid capsule?
An XLR Cable.
I’ve had the same one for years and years, and it seems to do just fine.
Some people claim there are huge differences in higher-priced cables, but I can’t really speak to that from experience.
I’ve only ever had one cable, and it’s served me well since about 2007.
An Audio Interface, Mixer, or another device to plug the mic into.
As we’ve discussed above, you won’t need 48V Phantom Power for a Dynamic mic, but you can still plug it into the Interface as a way of laying down a track.
Just don’t press the 48V switch, and you’re golden.
You could also opt for a mixer if that’s more your cup of tea.
As I said, I prefer the Interface because of how versatile it is.
Right now, I have my mic plugged in (just in case I want to record something) and I’m listening to music as we speak out of my Studio Monitors.
I also have my HD600s on standby, just in case I want to switch over to those and really dissect the music using the 2i2’s headphone jack input.
However, for that, I generally tend to use a dedicated Headphone Amp.
- Related: How to Choose a Headphone Amp!
Some sort of sequencer to lay the track down.
I typicall use FL Studio to record vocals, but if you’re brand new, the free Audacity works just fine.
You could opt for something like Reaper as well.
They give you a free 60-use trial which is great because 1 use only counts if you open the program.
I’ve been demoing Reaper and highly recommend it. It’s really fun to use and also incredibly intuitive.
I’ve used Steinberg’s Nuendo in the past and that was cool too.
That’s basically it. Don’t forget to turn on 48Vv Phantom Power if you’re using a Condenser!
To round this article out, let’s take a look at some of my picks…
Top Recommendations

My previous go-to solution for 99% of people was the Blue Yeti, but there is a better option now.
For a wonderful dynamic mic, it’s definitely Shure’s SM57, and you can fist pump at checkout too.
As for my favorite condenser, that’s up in the air right now. I’m currently demoing some products so check back soon!
Final Word
Choosing a Studio Microphone shouldn’t be too complicated of a process.
Once you have an idea of what you’re looking for and exactly all that a mic entails, it becomes fairly straightforward.
Just think about what you’ll be using it for, and the level of convenience you’re after, and also consider some of the studio components we discussed today.
Will you need any of them? I would recommend a Mic Stand and Pop-Filter for any mic you decide on.
Well, that’s about it for today folks! I hope you’ve come away with some valuable insight on How to Choose A Microphone.
How did I do? Suggestions for improving this article? Do you need any further clarification on anything? Did I leave anything out? Let me know!!
Questions? Comments? Requests? Did I miss the mark on something? Let me know in the comments below or Contact me!! I would love to hear from you…
Until then, all the best and God bless…
-Stu
Can’t decide which headphones to purchase? Interested in a complete buyers guide outlining over 40 of the best options on the market? Click on over to the best audiophile headphones to learn more!!
Be sure to also check out my Reviews and Resources page for more helpful and informative articles!
